Advanced Usage
There are a number of options available to customize the output of the tool, to ignore certain releases or PRs, to add custom text, etc. These options are described below. For using these from the command line or config file, see the respective sections.
Tip
Read this Advanced Section through to the end to learn how to configure the tool to your exact needs. There are a lot of options, but the defaults should be a usable starting point to work from.
Release Section Headers
There are a several section headers defined by default, which are used to group the PRs in the changelog for each release. These are taken from the GitHub labels applied to the PR. The default section headers are:
| Title | Label | Notes |
|---|---|---|
| Breaking Changes | breaking | |
| Merged Pull Requests | Any PR with NO labels | |
| Enhancements | enhancement | |
| Bug Fixes | bug | |
| Refactoring | refactor | |
| Documentation | documentation | |
| Dependency Updates | dependencies |
You can tag each of your PRs with any of these labels to group them in the changelog - If you are using Dependabot, by default it will add the dependencies label.
Warning
For the moment, limit your PRs to a single label, as otherwise the tool will include the PR in each section it finds a label for. This will be improved in future versions. I also plan to add the ability to use multiple labels for the same section, eg enhancement and enhancements
Labels are case-insensitive, so bug or BUG will both match "Bug Fixes". The above order is also the order that the sections will appear in the changelog, again this order will be customizable in future versions.
Custom GitHub Labels
GitHub provides a few default labels, but you can also create your own custom labels and then add them to the extend_sections option in the config file. See Custom Sections for more details.
For example, the breaking and refactor labels are not default GitHub labels, but are ones I add to all my projects personally.
Custom Sections
You can also add your own custom section headers, by adding a label to your PRs that matches the label you specify in the config file. For example, if you add the following to your config file:
extend_sections = [
  { title = "Automatic Testing", label = "testing" },
  { title = "Security", label = "security" },
]
Now, any PRs that have the testing label will be added to a section called Automatic Testing, and security labels will be in Security. By default these are inserted just before the Dependency Updates section, but you can specify the extend_sections_index value in the config file to change the index at which they they are inserted.
Be Aware of the Index!
The value of extend_sections_index is the index of the section, not the position. The first section has an index of 0, the second has an index of 1, etc. So if you want your custom sections to appear after the Enhancements section, you would set the extend_sections_index to 3 (the index of the next section, Bug Fixes)
HOWEVER this index is the index of the default sections (listed above) that you want to insert BEFORE, even if those sections are not displayed. So an index of 0 to 2 could still be before the Enhancements section, if the Breaking Changes or Merged Pull Requests sections are not displayed. Play with the value to get the desired result  .
.
Finally, the Closed Issues section is separate and always displayed first regardless of the extend_sections_index value.
Verbose TOML Arrays
The format for this option is an array of tables, with each table containing a title and a label. The above example uses an inline TOML array of tables but the more verbose format will also work:
[[changelog_generator.extend_sections]]
title = "Automatic Testing"
label = "testing"

[[changelog_generator.extend_sections]]
title = "Security"
label = "security"
Verbose arrays like this must come at the end of the config file, after all the normal settings!. Inline arrays can be with the other settings.
Note the double square brackets and the inclusion of the changelog_generator prefix! Inline arrays as in the first example are just a bit easier to read and IMHO look nicer.
Renaming Default Sections
You can also rename the default section headers using the rename_sections option in the config file. For example, if you want to rename the Enhancements section to New Features, you would add the following to your config file:
rename_sections = [{ old = "Enhancements", new = "New Features" }]
You specify the original title of the section you want to rename as old (case sensitive!), and the new title as new. You can rename as many sections as you want, just add more tables to the array.
The same notes apply to this option as to the extend_sections option above, you can use the inline array format or the verbose format as you prefer.
Custom Date Format
The date_format setting allows you to specify a custom date format for the release dates. The default is "%Y-%m-%d" (Year-month-day) which will give you dates like 2023-10-01. You can use any of the normal Python strftime options to customize the date format. This is a full timestamp, so you can include the time as well if you want (though that is probably a bit overkill for a changelog).
I quite like "%B %d, %Y" (month day, year) which will give you dates like November 01, 2023.
There is no CLI option for this setting, so you will need to edit the config file manually if you want to change it.
Ignored Labels
There are a few labels that are ignored by default and will not be included in the changelog. These are:
duplicateinvalidquestionwontfix
These are ignored for both PRs and Issues.
Customizing Ignored Labels
There are three ways to customize the ignored labels, all using settings in the config file. There are no equivalent command-line options for these settings.
ignored_labels
The ignored_labels setting is a definitive list of labels that should be ignored. This totally replaces the default list. For example, if you only want to ignore the wontfix label, but include every other label, you would add the following to your config file:
ignored_labels = ["wontfix"]
 If this setting is present in your config file, the
 extend_ignored and allowed_labels settings will be silently ignored.
extend_ignored
The extend_ignored setting is a list of labels to add to the default list. For example, if you don't want to list documentation changes in the changelog, you could add the following to your config file:
extend_ignored = ["documentation"]
This setting is ignored if you also have the ignored_labels setting in your config file.
allowed_labels
Finally, the allowed_labels setting is a list of labels that should be included, even if they are in the default list. For example, if you want to include the question label in the changelog, you could add the following to your config file:
allowed_labels = ["question"]
This setting is ignored if you also have the ignored_labels setting in your config file.
Tip
You CAN combine the extend_ignored and allowed_labels settings if needed , but it is probably easier to just use the ignored_labels setting instead.
Ignoring Specific Users
You can also ignore PRs and Issues from specific users, using the ignored_users setting in the config file. For example, if you want to ignore PRs and Issues from the pre-commit-ci[bot] user, you could add the following to your config file:
ignored_users = ["pre-commit-ci[bot]"]
This is a list of strings and is optional. If you do not specify this setting, all users will be included. This is NO command-line equivalent for this setting.
Adding Arbitrary Text
It is possible to add arbitrary text to the changelog, either at the top of the changelog, between releases, or to a specific release.
Add an introductory paragraph
You can add an introductory paragraph to the top of the changelog, using the intro_text setting in the config file. For example, if you want to add a paragraph to the top of the changelog, you could add the following to your config file:
intro_text = """
This is an auto-generated log of all the changes that have been made to the
project since the first release.

This project adheres to [Semantic Versioning](https://semver.org/spec/v2.0.0.html).
"""
As seen above, you can use triple quotes to add a multi-line paragraph. If you only have one line of text, use normal quotes:
intro_text = "This is the project Changelog."
Tip
This text is Markdown formatted, so you can use any Markdown formatting you want. Remember that a single return in Markdown is ignored, so if you want a blank line between paragraphs, you need to add two returns.
The default value for this setting is an empty string, so if you do not specify this setting, no introductory paragraph will be added.
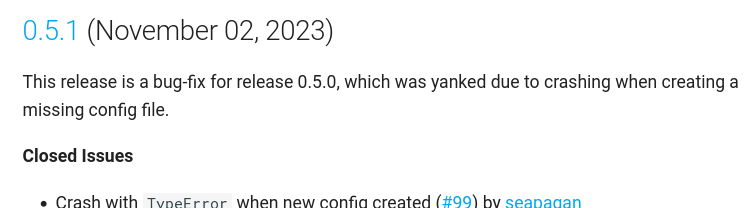
Add text to a specific release
You can add text to a specific release, using the release_text setting in the config file. For example, if you want to add a paragraph to the 1.2.3 release, you could add the following to your config file:
release_text = [
  { release = "1.2.3", text = "This is a paragraph for the 1.2.3 release." }
]
Generally you would add more than one line of text, so you can use triple quotes and the verbose format:
[[changelog_generator.release_text]]
release = "1.2.3"
text = """
This is a longer paragraph for the 1.2.3 release. It can contain multiple lines
of text, and can use **Markdown formatting**.
"""
Using the special release tag "unreleased" you can add text to the top of the 'Unreleased' section too:
[[changelog_generator.release_text]]
release = "unreleased"
text = """
These are the changes that have been made to the main repository since the last
release. You can try out these by cloning the repository and installing locally.
Everything in this section will be included in the next release.
"""
Tip
In both cases, this text is Markdown formatted, so you can use any Markdown formatting you want. Remember that a single return in Markdown is ignored, so if you want a blank line between paragraphs, you need to add two returns.
There is NO command-line equivalent for this setting.
Below is an example of how this looks in the changelog for this project:
Adding text between releases
You can add a text section between releases, using the releases_text_before setting in the config file. For example, if you want to add a paragraph between the 1.2.3 and 1.2.4 releases, you could add the following to your config file:
[[github_changelog.md.release_text_before]]
release = "1.2.4"
text = "This is a paragraph between the 1.2.3 and 1.2.4 releases."
The release value is the release that the text will be added before, working from top to bottom in the changelog. So in the above example, the text will be between the 1.2.4 and 1.2.5 releases.
You can either use the inline or verbose format for this setting, depending on how much text you want to add. There is NO command-line equivalent for this setting.
Completely replace a Release Text
You can completely replace a release with your own text, using the release_overrides setting in the config file. For example, if you want to replace the 1.2.3 release with your own text, you could add the following to your config file:
release_overrides = [
  { release = "1.2.3", text = "This is replacement text for the 1.2.3 release." }
]
In this case, the release value is the release that will be replaced with your text. The text value is the text that will replace the release notes for that release. This text is standard Markdown formatted. There is NO command-line equivalent for this setting.
Tip
This completely replaces the release notes for that release, no PRs or Issues will be included. The diff links will still be generated.
It is very useful for the first release of a project, where there is no previous release to compare to, or there is a huge amount of noise in the changelog from the initial commits.
See the CHANGELOG for this project for an example of this in action, and the configuration file that was used to generate it.
Again, the more verbose format is probably easier to read if you have a lot of text to add:
[[changelog_generator.release_overrides]]
release = "1.2.3"
text = """
**Replacement Text**

This is **replacement text** for the release notes of version 1.2.3.

No autogenerated text will be included in the release notes for this version.
"""
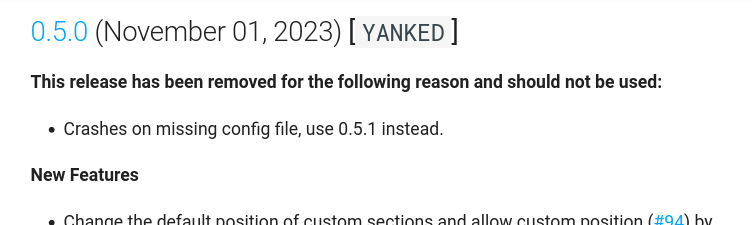
Mark a release as "Yanked"
Sometimes you may need to mark a release as "Yanked" (or "Retracted") for various reasons. You can do this using the yanked setting in the config file. This is a list of dictionaries, with each dictionary containing the release and reason keys. For example, if you want to mark the 1.2.3 release as "Yanked", you could add the following to your config file:
yanked = [
  { release = "1.2.3", reason = "Ooooh, nasty nasty bug - use 1.2.4 instead!!!" }
]
Tip
This only marks the release in the Changelog. It is up to you to actually remove/yank the release on GitHub, PyPI or wherever you have published it.
For an example of how this looks in the changelog, see below for an example from this very project:
You can add as many releases as you want to this list, just add more dictionaries to the array - you can also use the more verbose format for arrays as mentioned above. There is NO command-line equivalent for this setting.